If you are on Windows and need to “shell” into a Linux machine then PuTTY is the tool of choice. For password based logins it’s as simple as entering the IP address or name of the machine you want to connect to but for key based logins things get a little more complicated. This guide will show you how to generate a key pair and use it to quickly and efficiently log into a machine. The target machine that I will be logging into is a virtual machine living in an OpenStack cloud, by default these machines don’t allow password based login.
Downloads
Head on over to the putty site and download: putty, puttygen and pageant.
The putty utilities don’t require installation and are standalone executables so just place all three files in a folder on the desktop or somewhere else convenient (I tend to have putty install on the taskbar). Putty will work with all modern versions of Windows.
Generate a Public/Private Key-Pair
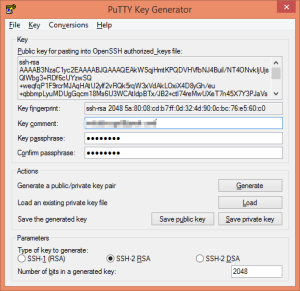
Double click puttygen to start the application. At the bottom of the window make sure SSH-2 RSA is selected and set the number of bits in a generated key to 2048. Note that as time passes and machines become more powerful the number of bits needed increases, 2048 should be good for a long while yet though. Click generate and then move the mouse about to generate some randomness.
After a short bout of exercise moving the mouse around you should have a key pair generated. In the “Key comment” field you typically enter your email address. You can also specify a pass phrase that will be used to encrypt the private portion of the key, it is not mandatory but it is good practice.
Click “Save public-key” and enter a name for the file. It doesn’t matter what the name is but if you are generating it for a specific machine it makes sense to include some identifier in the name. I generally start the file name with “public_key_” and give it a .txt extension since it’s human readable.
Click “Save private key” and enter a name. I generally start the file name with “private_key_”, the .ppk extension is required. Note that your private key should, as the name suggests, remain private to you. Make sure the private key is kept safe and backed up, if it is lost you’ll not be able to log into any machines using this key.
Finally, copy the public key from the Puttygen window.
Adding the Key to the Server
OpenStack
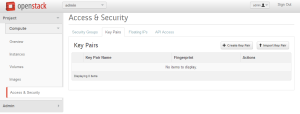
Log into OpenStack Horizon and under Compute select “Access & Security” then select the “Key Pairs” tab.
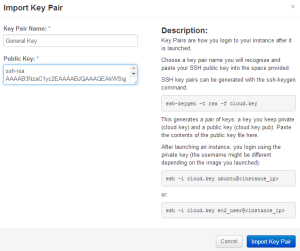
Click “Import Key Pair” to bring up the “Import Key Pair” dialog. Enter a name for the key you are importing and paste in the public key generated by Puttygen then click “Import Key Pair”. Note: key pair names shouldn’t contain spaces, I removed it before continuing.
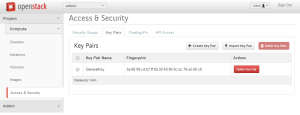
You should now see a key pair listed.
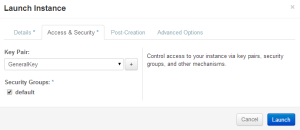
When you first launch an instance on OpenStack you are presented with a range of different settings to configure the virtual machine. I won’t go into them all here but the one of interest currently is “Access & Security” as shown below. If it’s not already selected use the drop down to select the key that you just imported.
When you launch this instance it will be automatically populated with the chosen key.
Regular Servers
To be written…
Create a Putty Profile
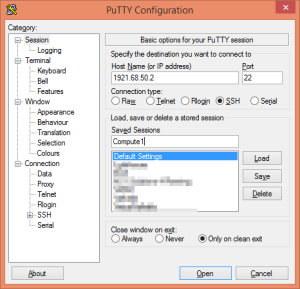
Start Putty and enter the IP address (or host name if you have it) of the machine you want to connect to. Make sure the port is 22 and the connection type is SSH – these are the default. Now enter a friendly name under Save Sessions and click the Save button. This saves the current settings making it quicker to get to the machine next time. Note: you will want to type the IP address in correctly 😉
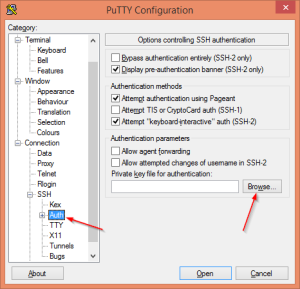
Next attach the private key to the session. In the tree on the left, under connection expand SSH and select Auth. Click the “Browse” button and select the private key file you created above.
Go back to Session (top of the left hand tree) and click the Save button to save the changes.
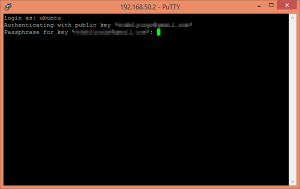
Click the Open button at the bottom of the screen to test the connection settings, this will attempt to log you into the server. Enter a username and then enter the pass phrase for the private key.
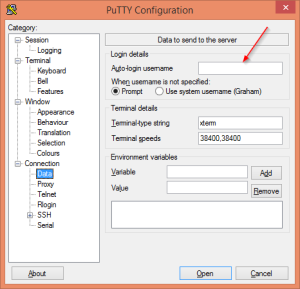
Since I am logging into an Ubuntu cloud image for the first time the username is still the default “ubuntu” which I’ll likely change. Once I’ve changed the username I’ll have Putty remember and supply the username for me by entering it under Connection –> Data
Using Pageant to Remember the Passphrase
If you log in and out of machines a lot it can become irritating to have to type in the passphrase all the time especially if like me you use complex passphrases. Assuming you are working on a secure machine you can avoid this hassle by using Pageant to remember the passphrase for you.
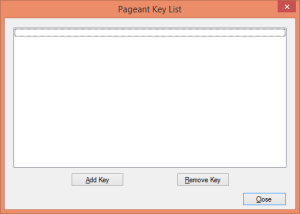
Double click Pageant to start it. It initially starts minimized and can be found in the system tray at the bottom right near the clock. Double click on it to open the window.
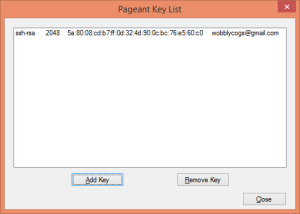
Click the Add Key button and select the private key you created above. Enter the passphrase for it when prompted.
As long as Pageant is running you should no longer need to enter the passphrase when logging into machines using this key-pair.
Unfortunately Pageant doesn’t remember keys across sessions so each time you start it up you have to re-add all the private keys and enter each passphrase. On the upside the Pageant utility does allow you to specify a key to load on as an argument to the executable so it’s easy to write a little batch file that will load each key in turn and ask for the passphrase.

